Sunday, March 18, 2012

Weather Exploration


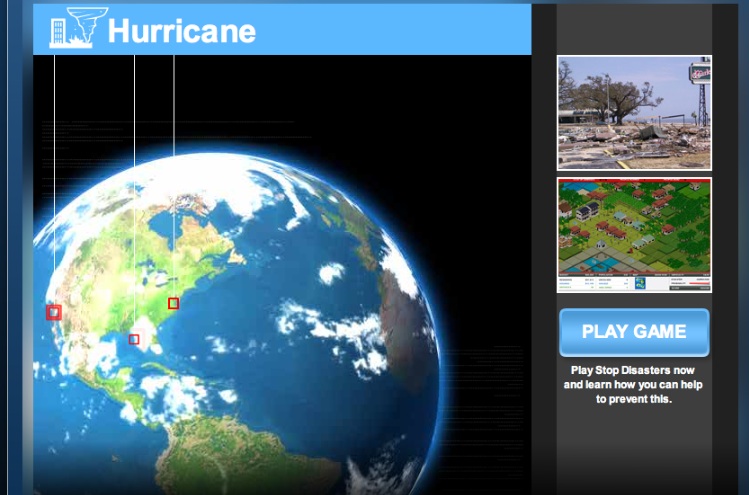
          This week I was introduced to an engaging weather site called Stop Disasters. This site lets the user choose a natural disaster and then is given money to make preparations for the town. The user becomes a sort of city planner. The game allows the user to choose their disaster such as flood, earthquake, tsunami, hurricane,  or wildfire. 


          I showed my daughter and she started playing it. She is in tenth grade. She enjoyed the game and it soon became one she could not stop playing. The best part about the game is that she is learning what it is like to start preparations to protect an area from a natural disaster. You can make the game as easy or as hard as you want. I have to admit, when I played I chose the easy level and still had trouble winning but I am not giving up. I plan to try again until I succeed.

          You can make this game a part of a lesson or even make it a part of free time on the computers. Check it out and let me know what you think.


Saturday, February 4, 2012

Exploring Food Chains

Recently, my students learned about food pyramids, food chains and food webs. I always enjoy teaching this lesson because I end up learning something new.


First, I started planning my lesson with the end in mind? I wanted my students to be able to work in small groups and create a food web mobile. To build up to that project, I first began with a yarn activity which we passed around the room from producer to primary consumer to secondary consumer, etc. I learned that my latter classes needed smaller groups for this activity. They would get silly and drop the yarn and mess everyone up. My first two classes of the day did well with the activity...maybe because they were still waking up.


The next day I gave students a timed task. They had 15 minutes to place pictures on a sheet of bulletin board paper. Then they had to place the pictures in a food chain or food web and use markers to draw arrows showing the flow of energy. This activity went off without any difficulty.


I divided students into small groups of four to five students and monitored students as they created food chain mobiles. I was thrilled with the end result. This was a project that was easy to differentiate among various learners and learning levels. Their were a few small mistakes such as the oceanic food chain with a turtle that had feet instead of flippers; but overall, it was a real success.


Sunday, January 22, 2012

Not Sure of the Answer, then Ask a Scientist. Well..., Maybe

I went into last week's assignment excited. I would finally get an answer to a question that has been eating at me since I started teaching. The questions dealt with genetics. Each year we cover red blood cells and blood types. My Ask-A-Scientist question was about blood types. We always hear about DNA tests to test the paternity of a possible parent. (My kids always see this on talk shows.)


I want to know, can't they check the blood types first before going through the expense of a DNA test? I realize it may sound a little silly; yet, every year this question comes up and I always answer it with an example: two O+ parents cannot make an A- child.

Well, one the Ask-a-Scientist website I posed my question. It was not found in the archives so I submitted the question to the website. I checked my email often to see if I received a response. I never did. So I would love to talk about how my curious question was finally answered but I cannot. I cannot state as to whether or not the scientist's answer brought me to a deeper understanding of the subject matter.

I can imagine using the website with students, providing their questions receive answers. There are many times my students have a question that I am not qualified to answer. It would be nice to point them to a helpful link that could answer those questions.

For now, I am still waiting on a response. I wonder if I will get one. Sigh...

Sunday, January 8, 2012

To Use or Not to Use: A Review of Some Tools for Educators/Presenters     by Edie Flores

Vcasmo

This week I reviewed three websites, which offered inventive ways for the user to make a presentation to share with others, whether online or in person. The first tool I visited was found at www.vcasmo.com. The site offers a unique feature where the user can create both a video and presentation and show them side by side. Your presentation window is twice as long allowing your video to run alongside a PowerPoint-type presentation.

When I initially visited the site, I decided to sign up. Following registration, you are sent a confirmation email.  I waited all day for mine and did not receive it until the next day. What I like about this software is being able to have a pre-recorded audio commentary alongside a presentation slides. I viewed one user’s “how to” video which explained how to make a presentation in seven easy steps. It was very easy to follow and simple to understand. I like that this can be viewed by anyone from any web browser. I also like the ability to share the video publically or with a certain group. I could picture myself using the video to explain a current presentation. Many times students are absent and miss the lecture portion of a class. A presentation like this could be made available to help those students by posting it to the class website.


Ahead

The next tool I viewed was found at www.ahead.com.  This was a site best used for someone who had a touch screen computer. With the simple touch of your fingers, you can drag objects and adjust them to your own specifications. You would think this would be great application for iPad but since Apple and Adobe are not friends, you have one of two choices. 1.) You can use what ahead calls their “highly degraded html version” or 2.) You can use one of iPad app browsers like iSwifter or the eCloud, which allows flash content using a server. The only problem with the second option is the lag time. I am too impatient to wait. I opted to try the html version.

So here I am, signed up (registered), and ready to begin. I get a pop-up suggesting I upload a file. I upload a small video of my daughter when she was an infant. Using my laptop, I uploaded a file. Only problem was when I chose to preview it, I only had audio and no video. However, I did have a video thumbnail. I saved my work and logged in using my iPad.  On first try, I used my Safari browser. I thought surely the degraded version is worth a try; however, it would not load. Any time I chose the link for the html version, it brought me to a window that that said I need flash player. So then, I used an app called iSwifter. This is an app that allows me to have flash on my iPad. I was able to log in and actually see the thumbnail of my video but that’s where it all stopped. I could not manipulate any objects for re-sizing.


Ahead seems like a great tool to use, but as with a lot of software educators use, we have to wait until our pcs catch up to the technology. :o(


Empressr

The third site I visited was www.empressr.com. This site allows you to create a presentation with video, photos, audio, music and share it publically or privately.  It took no time at all to register for a free account. There were several methods where you could either start with a blank presentation, use ready-made templates or use the expressr express, which allows you to upload your pictures and get right to work. I chose this method.
What I liked about this software was the ease of use. You have a larger viewing plan from which to see all of your work. You have the typical side border showing your slides, much like PowerPoint. You also have quick adds such as shapes and charts. I added a few in the picture below. Because this is the express method, page transitions are decided for you, which takes the fuss out of things for you. I found it very easy to maneuver and edit.


Bottom Line

In today’s world of technology, it is always aggravating when you want to assign a student a presentation and they do not have the software, such as Microsoft Office on their computer.  The same could be said for teachers who have older computers at home. Then there are those kids and teachers who get a laptop for Christmas only to find out it came with Microsoft Works and not Office. Having access to online presentation software via the web is a great alternative. You can send a link, and viola, your presentation is ready to go.


References:

Ahead retrieved from: http://ahead.com/#view/lilaspaces/main/welcome?scene=HOME

Evans, Craig. Vcasmo. Ten (10) Easy Steps to Create an Online Program retrieved from:  http://vcasmo.com/video/Autismhangout/6518

Expressr retrieved from: http://www.empressr.com on January 5, 2012.

Vcasmo retrieved from: http://vcasmo.com/video/Autismhangout/6518 on January 6, 2012.

Sunday, October 16, 2011

Week 6: Conservation of Mass and Energy

 In this week's assignment, I was challenged to find my "most powerful" websites, and I found several. Conservation of mass and energy is a big idea for most middle school students. So I decided to see what's out there. If one of my students wanted to gain a better understanding, what would they do? They would Google the topic.

The very first "hit" I got on the topic was from Wikipedia. This is a website I discourage with my students due to reliability issues. So I moved on. One great website I came across was http://www.neok12.com/Law-of-Conservation.htm. This site has wonderful short videos which are easy to understand. I viewed one on the law of conservation of energy using a bowling ball as part of a pendulum. The teacher gave a great demonstration for his students along with an explanation of what they were viewing.

Another great site I stumbled upon was http://www.learner.org/resources/series42.html. This site is great for both teachers and students. This is a video that shows physics in every day life such as: riding in a hot air balloon, listening to a symphony and even visiting a bicycle shop.

My classes contain a wide variety of learners. Some students are in my room just to be exposed to science. I found one website that I could use for my lower learners and also as an activity for early finishers. I came across an online game called "Reduce the Use". This was an online game which guides the user throughout a home with the task of finding ways to conserve energy.You can play the game at  http://www.reducetheuse.ca/.

For further enrichment, I found a great website called "Science Geek". This site had all sorts of activities in chemistry. There are games for every topic including the conservation of matter. One game I could see myself using in my own classroom was "Balancing Chemical Equations". Here, students can practice their skills at balancing chemical equations. This activity is a great way for students to actually see the conservation of matter.  The atoms add up.

Of all the sites I discovered, one did stand out and quickly became my favorite. Learningscience.org is a great website for middle school lessons on forces and motions. Each activity allows the user to manipulate variable and test outcomes. The lesson I found on conservation of energy allows students to manipulate a skateboarder's ramp. You can see an instant graph of the results. I liked the way it showed students how you could only get what you put in. In other words, the skateboarder will only return to a point slightly lower than his starting position. Students have three sections of the ramp they can manipulate to see how it effects the energy. The website is found at http://www.learningscience.org/psc2bmotionforces.htm.

The idea of the physics in music had my attention. I think it would be neat to bring in instruments of different varieties. I would set up a straw in a glass goblet. Then I would play each instrument and have students observe how much movement occurred with the straw. It may be a challenge to bring in the variety of instruments and play them successfully but I am up for it.

Sunday, October 2, 2011

Week 4 Experiment Reflections


          There are various materials used to keep both food and people warm. As a child, I knew that Styrofoam cups kept hot drinks hot. However, today I often wonder why many coffee shops use paper cups. Canadian scientist Martin Hocking showed in his research that manufacturing a paper cup uses as much petroleum or natural gas as the polystyrene cup (Eco Joe, 2008). I kept this in mind as I set up my experiment. My independent variable was the materials used. My constants include identical mugs and the starting temperature of the water. My dependent variable was the measured heat loss. 
The Materials
            For this experiment, I would need the following materials: four identical coffee mugs, hot water, measuring cup, four insulators, a timer, and a thermometer. My four insulators were cotton fabric, one paper towel, aluminum foil, and one sheet of copy paper. I chose these materials for two reasons. One, they were readily available in my home; and two, my curiosity see how they would compare.


Setting up the Experiment

I ran some water through my coffee pot and measured a cup of hot water in each mug. I covered each mug with one of the materials and secured with a rubber band. I set my timer for 30 minutes and waited. I completed one trial of my experiment. If I conducted this lab in the classroom, I would have my students conduct at least three trials to increase the validity of their data. I would then instruct students to take an average of the temperatures for each material used. Another observation for my students is to verify their knowledge of reading a thermometer. 


My Results

The starting temperature of the hot water was 155 degrees Fahrenheit. I measured the temperature of each cup as I removed its insulation. The cup covered with a sheet of copy paper registered 94ºF, a drop of 61 degrees. The cup covered with aluminum foil registered 98ºF, a difference of 57 degrees. The cup covered with cotton fabric measured 105ºF, a difference of 50 degrees. Finally, the cup covered with the paper towel measured 97ºF, a difference of 58 degrees. To my surprise, the cotton fabric insulated the best. Most winter coats contain insulation to help trap heat in close to the body. Some manufacturers use a polyester fiberfill in their winter coats for that purpose (J. Smith & N. Pitts, 2011). Another surprise was how close the paper towel-covered water measured to the aluminum foil-covered water.

If I conducted this experiment again, I would conduct at least three trials and use more materials to test. I would like to test the materials but use them as a sleeve over the cup. Then, I would compare the results from the two separate experiments. This would help me determine whether the cup materials or if using a sleeve is better.

In using this experiment, I would encourage my students to research the cost of manufacturing the cups and find which insulation is not only the best in preventing heat loss but also the most economical. This would introduce cost-effectiveness to the students and help them gain insight into why companies choose one material over another.
This experiment did not present me with any significant challenges. Only one came to mind. It might be more accurate for students to test one material at a time as opposed to all four materials at the same time. One must consider the time it takes to secure each material on each mug. The time lost might possibly skew the results. Overall, the lab is a great way to illustrate heat loss and insulators. Students can discover how they work through a lab such as this.

DATA
Insulators and Temperature
Material Used
(Insulator)
Starting Temperature of Water
Water Temperature (F) after 30 minutes
Water Temperature (C) after 30 minutes
Copy paper
155ºF/71ºC
94º
37º
Aluminum Foil
155ºF/71ºC
98º
41º
Cotton Fabric
155ºF/71ºC
105º
43º
Paper Towel
155ºF/71ºC
97º
39º
The table above contains my data records for the experiment. I have included Celsius measurements as well.

Four Identical Mugs

Four Different Materials (Insulators)

One Cup of Hot Water 

Starting Temperature: 155 degrees Fahrenheit


All Four Cups Covered for 30 Minutes

                                          Paper Towel Insulator: 97 degrees Fahrenheit    
     
                                         Cotton Fabric Insulator: 105 degrees Fahrenheit


Aluminum Foil Insulator: 98 degrees Fahrenheit

 Copy Paper Insulator: 94 degrees Fahrenheit


Sunday, September 18, 2011

Week 2: Slip Sliding Away

          Here I am in a new science course and this time I am exploring physics. I was give the task of exploring one of several scientific inquiries. I chose the questions “How do different surfaces affect the momentum of marbles?” I chose this question because it lines up with my own state’s objectives for eighth grade science. Under “inquiry”, students are to “design, conduct, and analyze conclusions from an investigation that includes using experimental controls” and to “recognize Newton’s Three Laws of Motion and identify a situation that illustrate each law” (Mississippi Science Frameworks, 2008). With my eighth grade students in mind, this seemed to be a great question to explore.
           I decided to use the blue marbles provided in my science kit. I sat at my dining room table and marked a starting position. Next, I set up the large marble and gave it a slight push. The marble rolled off the table. I measured from my starting point up to the end of the table, which came to 141.5 cm. I repeated this four more times for a total of five trials. Each time, the large marble fell off the table. I repeated the process with the smaller marble and achieved the same results. Next, I decided to try it on the floor in our hallway. The surface is smooth, similar to the tabletop’s surface. I completed five trials using each marble. In all trials, the marble eventually came to a stop. The average distance traveled for the large marble was 562 cm. The average distance traveled for the small marble was 604.7 cm.
           I returned to my kitchen table. This time I rolled the marble on a linen place mat. I measured the distance travelled. Both marbles stopped without rolling off the table. In fact, they never rolled off the place mat. The average distance travelled for the large marble was 31.6 cm. The average distance travelled by the small marble on the place mat was 30.7 cm. I noticed that the linen place mat was not as smooth a surface as the table. The linen place mat provided more friction for both marbles.
           For my final surface, I used a large plush towel. The average distance travelled by the large marble was 18.4 cm. The average distance travelled by the small marble was 13.3 cm. It was clear in my observations that the towel provided the most friction of all three surfaces. This lab was a perfect example of Newton’s First Law of Motion, also referred to as the law of inertia. Newton’s First Law of Motion states, “An object at rest stays at rest and an object in motion stays in motion with the same speed and in the same direction unless acted upon by an unbalanced force (The Physics Classroom, 2011).
           Because I had completed inquiry lessons on friction before, my results came as no surprise. However, the lesson was not wasted. I still learned from it. I could see expanding the surfaces I used. I would like to explore other surfaces such as grass, a dirt road, carpet, marble, etc. I also could foresee the parameters needed before doing this experiment with my students.
           If there were any challenges in this guided inquiry, it was my starting surface. The table was too short. I had to move to the floor for the first part of my experiment. This would need to be a consideration when used in the classroom, as well. If I did this activity in the classroom, I would place some meter sticks on the floor to create lanes. This would ensure that marbles do not roll under desks and filing cabinets. I would also need to have enough space for several small groups to conduct their explorations.
           I could envision using this activity as an introductory lesson to Newton’s First Law of Motion. I would like to tie it in to how friction helps us in routine activities. For example, when I have seen large trucks unloading their content at a large store, they have a special set up to make the work easier. They use a plank that looks like a ladder but instead of rungs, it uses poles that move. The plank stretches from the truck to the dock. All the workers must do is push the boxes across the plank to unload. The poles roll and provide little friction. The boxes glide across the plank and a worker will load them onto a pallet. The planks make the unloading process much easier than it would be without the device.
           I would continue the lesson on friction by having my students design their own planks. Students could use items like cardboard tubes from toilet paper and paper towel rolls, pvc pipe, etc. By designing their own planks, I would be utilizing the engineering design process in a lesson that has relevance to the real world. It is this type of activity that can leave a positive, lasting impression on students.
          Stop and consider that the plank design lesson stemmed from a science inquiry activity involving marbles, friction and the law of inertia. As science educators, we have to be willing to delve in a little deeper to find these meaningful activities. These activities must line up with our national and state standards. The activities should also encourage STEM education. Students need opportunities to problem-solve, explore, discover, and engage in situations that need solutions (Fioriello, 2011). It is these kinds of lessons that scientists, technicians, engineers, and mathematicians are born.


References:

Alsworth, C., Baird, C., Beasley, R., Bell, C., Billiongsley, T., Bishop, V., …Anjanete, Z. (2008). 2010 Mississippi science framework. Mississippi State Board of Education. 51-56.

Fioreiello, P. (2011) Understanding the basics of STEM. K-12 Education Practices & Issues. Retrieved from: http://drpfconsults.com/understanding-the-basics-of-stem-education/

The Physics Classroom, (2011). Newton’s first law of motion. The Physics Classroom retrieved from: http://www.physicsclassroom.com/Class/newtlaws/u2l1a.cfm